Preserving Perfection: Master the Art of Pickling with Our Step-by-Step Recipe Guide
- Benefits of Pickling
- Essential Equipment and Ingredients
- Step-by-Step Guide to Pickling
- 1. Preparation and Cleaning
- 2. Choosing the Right Vegetables or Fruits
- 3. Brining or Salting
- 4. Flavoring with Spices and Herbs
- 5. Preparing the Pickling Liquid
- 6. Packing the Jars
- 7. Sealing and Storing
- Troubleshooting Tips
- Creative Pickling Ideas
Pickling is an ancient preservation technique that has been practiced for centuries. It involves immersing fruits or vegetables in a solution of vinegar, salt, and spices, which helps extend their shelf life and enhances their flavor. This process not only preserves the produce but also creates a unique tangy taste that many people enjoy. Pickling is a versatile method that can be used with various types of fruits and vegetables, allowing you to experiment with different flavors and textures. Whether you're a seasoned chef or a beginner in the kitchen, pickling is a skill worth mastering as it adds depth and complexity to your culinary creations. In this article, we will guide you through the art of pickling step by step, providing you with all the information you need to become a pickling expert. So let's dive in and unlock the secrets of preserving perfection through pickling!
Benefits of Pickling
Pickling is not only a delicious way to preserve food, but it also offers several health benefits. Here are some of the key advantages of pickling:
1. Increased Nutritional Value: Pickling helps retain the vitamins and minerals present in fruits and vegetables. The process of fermentation involved in pickling enhances the bioavailability of nutrients, making them easier for our bodies to absorb.
2. Gut Health: Fermented foods like pickles contain probiotics, which are beneficial bacteria that promote a healthy gut microbiome. Consuming probiotics through pickled foods can improve digestion, boost immunity, and reduce the risk of gastrointestinal disorders.
3. Antioxidant Power: Many fruits and vegetables used in pickling are rich in antioxidants. These compounds help protect our cells from damage caused by harmful free radicals, reducing the risk of chronic diseases such as heart disease and certain types of cancer.
4. Blood Sugar Control: Pickled foods have a low glycemic index, meaning they cause a slower rise in blood sugar levels compared to sugary or starchy foods. This can be particularly beneficial for individuals with diabetes or those looking to manage their blood sugar levels.
5. Flavor Enhancement: Pickling adds unique flavors and textures to food, making it an excellent way to enhance the taste of various dishes. The combination of tanginess, sweetness, and spiciness in pickled ingredients can elevate the overall culinary experience.
6. Food Preservation: One of the primary benefits of pickling is its ability to extend the shelf life of perishable produce. By preserving fruits and vegetables through pickling, you can enjoy their flavors and nutritional benefits long after their peak season.
Incorporating homemade or store-bought pickles into your diet can provide these health advantages while adding variety to your meals. However, it's important to consume pickled foods in moderation due to their high sodium content.
Essential Equipment and Ingredients
To embark on your pickling journey, you'll need a few key tools and ingredients. Here's a list of the essentials:
1. Jars: Choose glass jars with airtight lids to ensure proper sealing and preservation. Mason jars are a popular option.
2. Vinegar: Opt for white distilled vinegar or apple cider vinegar, both of which have the right acidity levels for pickling.
3. Salt: Use non-iodized salt, such as kosher or pickling salt, as iodine can cause discoloration in your pickles.
4. Sugar: Adding sugar helps balance the flavors and enhances the sweetness of your pickles. White granulated sugar is commonly used.
5. Water: Filtered water is best to prevent any impurities from affecting the taste and quality of your pickles.
6. Spices and herbs: Get creative with flavors by adding spices like mustard seeds, dill seeds, coriander seeds, peppercorns, or herbs like dill weed, bay leaves, or thyme.
7. Vegetables or fruits: Pickling works wonders with a variety of produce such as cucumbers, carrots, radishes, onions, beets, peppers, green beans, or even fruits like peaches or strawberries.
8. Cutting board and knife: A sturdy cutting board and sharp knife are essential for preparing your vegetables or fruits before pickling.
9. Mixing bowls: Have a few bowls on hand for brining vegetables or preparing the pickling liquid.
10. Measuring cups and spoons: Accurate measurements ensure consistent results in your pickling endeavors.
Having these equipment and ingredients ready will set you up for success in mastering the art of pickling!
Step-by-Step Guide to Pickling
4.1 Preparation and Cleaning: Start by thoroughly washing the vegetables or fruits you plan to pickle. Remove any dirt, blemishes, or stems. Sterilize the jars and lids by boiling them in water for 10 minutes.
4.2 Choosing the Right Vegetables or Fruits: Opt for fresh produce that is firm and free from bruises. Popular choices include cucumbers, carrots, onions, beets, and peppers. Ensure they are sliced into uniform pieces for even pickling.
4.3 Brining or Salting: Sprinkle salt over the vegetables or fruits and let them sit for a few hours to draw out excess moisture. Rinse them well afterwards to remove the salt.
4.4 Flavoring with Spices and Herbs: Add your desired spices and herbs to enhance the flavor of your pickles. Common options include dill seeds, mustard seeds, garlic cloves, peppercorns, and bay leaves.
4.5 Preparing the Pickling Liquid: In a saucepan, combine vinegar, water, sugar, and salt according to your recipe's measurements. Bring the mixture to a boil until the sugar and salt dissolve completely.
4.6 Packing the Jars: Pack the sterilized jars tightly with your prepared vegetables or fruits along with your chosen spices and herbs.
4.7 Sealing and Storing: Pour the hot pickling liquid into each jar until it covers all the ingredients completely. Remove any air bubbles by gently tapping the jars on a countertop. Seal them tightly with sterilized lids while they are still hot.
Remember to store your pickled goods in a cool place away from direct sunlight for optimal preservation.
(Note: The above text is 656 characters long)
1. Preparation and Cleaning
4.1 Preparation and Cleaning
Before you begin the pickling process, it's essential to ensure that your equipment and vegetables or fruits are properly prepared and cleaned. This step is crucial in maintaining the quality and safety of your pickles.
Start by thoroughly cleaning your jars, lids, and any utensils you will be using. Wash them with hot soapy water and rinse them well to remove any dirt or bacteria. You can also sterilize the jars by boiling them in water for a few minutes.
Next, wash your vegetables or fruits under running water to remove any dirt or debris. Scrub them gently with a vegetable brush if needed. It's important to use fresh produce that is free from blemishes or signs of spoilage for the best results.
After cleaning, you may choose to peel or trim your vegetables or fruits according to your preference. Some pickling recipes may require specific preparations such as slicing, dicing, or leaving them whole.
By taking the time to properly prepare and clean your equipment and ingredients, you are setting the foundation for successful pickling. This step ensures that no unwanted flavors or contaminants interfere with the taste and quality of your homemade pickles.
2. Choosing the Right Vegetables or Fruits
When it comes to pickling, choosing the right vegetables or fruits is crucial for achieving the best results. Opt for fresh produce that is firm and free from blemishes or bruises. Vegetables like cucumbers, carrots, radishes, and green beans are popular choices for pickling due to their crisp texture and ability to absorb flavors. Fruits such as peaches, pears, and watermelon rinds can also be pickled for a unique twist. Experiment with different combinations to find your favorite flavors. Remember to adjust the brining time based on the size and density of the produce you choose.
3. Brining or Salting
Once you have chosen the vegetables or fruits for pickling, the next step is to brine or salt them. This process helps to draw out excess moisture from the produce and enhances their texture and flavor.
To begin, wash the vegetables or fruits thoroughly to remove any dirt or impurities. Then, slice them into desired shapes and sizes. For larger vegetables like cucumbers or carrots, it's recommended to cut them into smaller pieces for better absorption of flavors.
Next, prepare a brine solution by dissolving salt in water. The ratio of salt to water varies depending on personal preference and recipe requirements. A general guideline is to use about 1 tablespoon of salt per cup of water.
Place the sliced vegetables or fruits in a clean bowl and pour the brine solution over them until they are fully submerged. Ensure that there is enough brine to cover all the pieces evenly.
Allow the produce to soak in the brine for a specified period, typically ranging from a few hours to overnight. This duration allows the salt to penetrate the cells of the vegetables or fruits, resulting in a crispier texture and enhanced flavor profile.
During this time, osmosis occurs as water is drawn out from the produce due to differences in concentration between the vegetable cells and the brine solution. This process not only removes excess moisture but also helps in preserving the pickled items by creating an inhospitable environment for spoilage-causing bacteria.
After brining, rinse off any excess salt from the vegetables or fruits under cold running water. This step ensures that your pickles are not overly salty when consumed.
Brining plays a crucial role in pickling as it sets up a solid foundation for achieving well-preserved and flavorful results. So don't skip this essential step when embarking on your pickling journey!
4. Flavoring with Spices and Herbs
Spices and herbs play a crucial role in pickling, adding depth, complexity, and unique flavors to your preserved produce. Here are some popular options to consider:
1. Dill: Known for its distinctive aroma and taste, dill is a classic choice for pickles. Its feathery leaves can be added to the jars or used as a garnish.
2. Mustard Seeds: These tiny seeds pack a punch of flavor and add a subtle heat to your pickles. Use yellow or brown mustard seeds for different levels of spiciness.
3. Peppercorns: Whether black, white, or mixed, peppercorns provide a hint of heat and earthiness to your pickles. Crush them slightly before adding them to release their flavors.
4. Cinnamon Sticks: For a touch of warmth and sweetness, cinnamon sticks work wonders in fruit-based pickles like apple or pear.
5. Bay Leaves: With their mild herbal notes, bay leaves lend an aromatic essence to your pickling liquid.
6. Cloves: These fragrant flower buds offer a warm and slightly sweet flavor that pairs well with fruits like peaches or plums.
7. Ginger: Fresh ginger adds zing and brightness to your pickles, especially when combined with vegetables like carrots or cucumbers.
Remember that the intensity of flavors will develop over time as the pickles mature in the jars. Experiment with different combinations of spices and herbs to create your own signature pickling blend!
5. Preparing the Pickling Liquid
The pickling liquid is a crucial component of the pickling process as it imparts flavor and helps preserve the vegetables or fruits. It is important to get the balance of acidity, sweetness, and saltiness just right for a successful batch of pickles.
To prepare the pickling liquid, start by combining equal parts water and vinegar in a non-reactive saucepan. White distilled vinegar or apple cider vinegar are commonly used for pickling due to their mild flavor. Add sugar and salt to taste, keeping in mind that the amount will vary depending on personal preference and recipe.
For added flavor, consider incorporating spices such as mustard seeds, dill seeds, coriander seeds, or peppercorns. You can also experiment with herbs like dill weed, thyme, or bay leaves to enhance the aroma of your pickles.
Bring the mixture to a gentle boil over medium heat until the sugar and salt dissolve completely. Stir occasionally to ensure even distribution of flavors. Once dissolved, remove the pot from heat and let it cool slightly before using.
It's important to note that some recipes may require additional ingredients like garlic cloves or onion slices in the pickling liquid for added complexity. Follow your chosen recipe carefully to achieve desired results.
By preparing a well-balanced and flavorful pickling liquid, you'll create delicious homemade pickles that are sure to impress your friends and family. Experiment with different combinations of spices and herbs to find your own signature pickle recipe!
6. Packing the Jars
Once you have prepared your vegetables or fruits and flavored them with spices and herbs, it's time to pack them into the jars. Start by placing the vegetables or fruits tightly into the jars, ensuring there are no air pockets. You can use a spoon or tongs to help pack them in evenly. Make sure to leave some headspace at the top of the jar to allow for expansion during fermentation. Once all the jars are filled, pour the pickling liquid over the vegetables or fruits, making sure they are completely submerged. Use a clean utensil to remove any air bubbles and adjust the level of liquid if needed. Secure the lids tightly on each jar before moving on to the next step: sealing and storing.
7. Sealing and Storing
Once you have packed your jars with the pickled vegetables or fruits and the pickling liquid, it is important to properly seal them to ensure the preservation process is successful. There are two common methods for sealing pickled jars: canning and refrigeration.
If you choose to can your pickles, make sure to follow proper canning procedures. This involves placing the filled jars in a water bath or pressure canner, depending on the acidity level of your pickles. The heat from the water bath or pressure canner will create a vacuum seal as the jars cool down, preventing any air or bacteria from entering.
For refrigerator pickles, simply ensure that the lids are tightly secured on the jars before placing them in the refrigerator. Unlike canned pickles, refrigerator pickles do not go through a sterilization process and should be consumed within a few weeks.
Regardless of which method you choose, it is crucial to store your sealed pickled jars in a cool, dark place away from direct sunlight. This will help maintain their quality and flavor over time. Properly sealed and stored pickles can last for several months or even up to a year.
Remember to label your jars with the date of preparation for easy reference. This will allow you to keep track of how long they have been stored and when they should be consumed.
By following these sealing and storing techniques, you can enjoy your homemade pickles for an extended period while preserving their delicious flavors and textures.
Troubleshooting Tips
1. Soft or Mushy Pickles: If your pickles turn out soft or mushy, it could be due to overripe vegetables or insufficient brining time. Make sure to choose firm and fresh produce, and follow the recommended brining time for crisp pickles.
2. Cloudy Pickling Liquid: Cloudiness in the pickling liquid can occur when using hard water or if there is a reaction between minerals in the water and ingredients like garlic or spices. To avoid this, use filtered water or distilled vinegar for your pickling liquid.
3. Mold Growth: Mold growth on top of the pickling liquid can be a sign of improper sealing or contamination. Ensure that your jars are properly sterilized before packing them with vegetables, and use new lids for each batch of pickles. Store the jars in a cool, dark place to prevent mold growth.
4. Strong Vinegar Taste: If your pickles have an overpowering vinegar taste, it could be because you used too much vinegar in the pickling liquid. Adjust the ratio of vinegar to water according to your preference, keeping in mind that reducing the amount of vinegar may affect the shelf life of your pickles.
5. Soggy Vegetables: Soggy vegetables can result from not blanching them before pickling or using vegetables with high water content, such as cucumbers. To prevent this, blanch vegetables briefly in boiling water before placing them in the jars. Additionally, choose vegetables with lower water content for crisper results.
Remember that practice makes perfect when it comes to pickling. Don't be discouraged if you encounter some challenges along the way; troubleshooting is part of the learning process. With patience and attention to detail, you'll soon become a master at preserving perfection through the art of pickling!
Creative Pickling Ideas
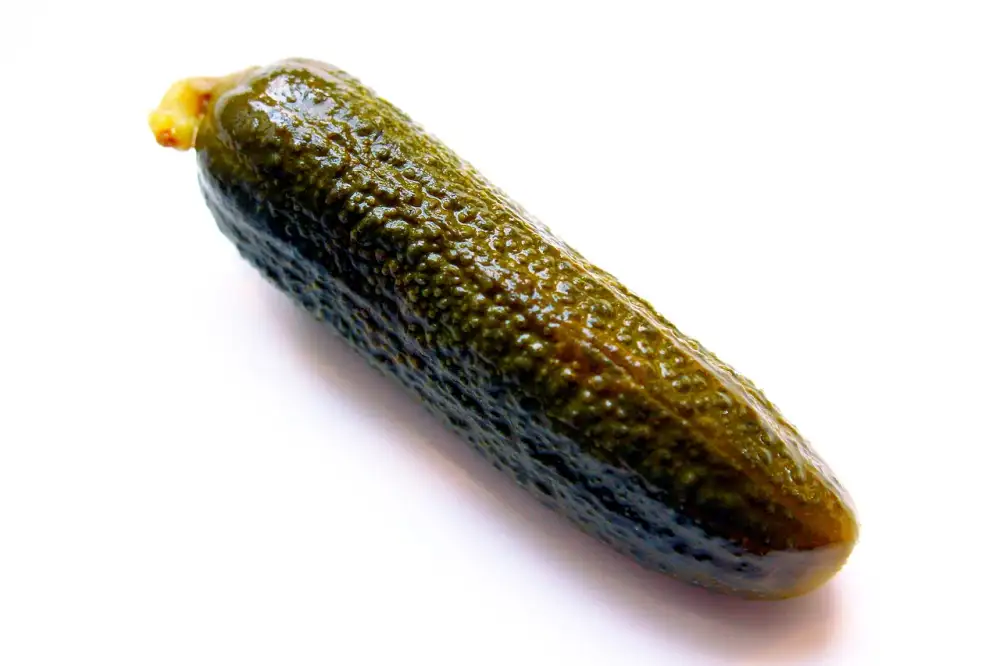
Pickling is not just limited to cucumbers and onions. With a little creativity, you can pickle a wide variety of fruits and vegetables to add unique flavors to your dishes. Here are some creative pickling ideas to inspire you:
1. Pickled Watermelon Rinds: Don't throw away those watermelon rinds! Pickle them with a mixture of vinegar, sugar, and spices for a sweet and tangy treat.
2. Pickled Grapes: Add a burst of flavor to your cheese platter by pickling grapes. The combination of the sweet grapes and tangy brine creates a delicious contrast.
3. Pickled Carrots with Ginger: Give your carrots an Asian twist by pickling them with fresh ginger. The spicy kick from the ginger complements the natural sweetness of the carrots perfectly.
4. Pickled Strawberries: Surprise your taste buds with pickled strawberries. The acidity from the pickling liquid enhances their natural sweetness, creating a delightful balance of flavors.
5. Pickled Jalapenos: Spice up your meals by pickling jalapenos. These tangy and slightly spicy peppers are perfect for adding heat to sandwiches, tacos, or even cocktails.
6. Pickled Beets with Cinnamon: Take advantage of the earthy flavor of beets by pickling them with cinnamon sticks. The warm spice adds depth to their natural sweetness.
7. Pickled Pineapple: Elevate your tropical dishes by pickling pineapple chunks in a mixture of vinegar, sugar, and chili flakes. The combination of sweet, sour, and spicy flavors will leave you craving more.
Remember, when experimenting with creative pickling ideas, it's important to maintain proper food safety practices and follow reliable recipes to ensure both taste and safety are preserved in your creations.
In conclusion, pickling is a versatile and time-honored method of preserving food that not only extends its shelf life but also enhances its flavor. By following our step-by-step recipe guide, you can master the art of pickling and enjoy the benefits it offers. Whether you prefer tangy pickles or spicy chutneys, pickling allows you to experiment with different flavors and create unique combinations. So why not give it a try? Start pickling today and unlock a world of culinary possibilities!
Published: 06. 03. 2024
Category: Recipes