Deliciously Fluffy and Easy Scone Recipe: Master the Art of Baking Perfect Scones
- Ingredients needed for a basic scone recipe
- Step-by-step instructions for making scones
- Preparing the dry ingredients
- Incorporating the cold butter
- Mixing in the wet ingredients
- Shaping and cutting the scones
- Baking the scones to perfection
- Tips and tricks for achieving the perfect scone texture and flavor
- Variations and additions to enhance your scone recipe
- Serving suggestions and accompaniments for scones
Scones, a beloved British baked good, have gained immense popularity worldwide due to their delightful taste and versatility. These small, round pastries are known for their fluffy texture and buttery flavor. Scones are often enjoyed as a breakfast or afternoon tea treat, accompanied by clotted cream and jam. With their rich history dating back to the 16th century, scones have become an essential part of baking traditions across cultures. Whether you prefer traditional plain scones or experiment with various flavors and additions, mastering the art of scone-making is sure to elevate your baking skills.
Ingredients needed for a basic scone recipe
To make a basic scone recipe, you will need the following ingredients:
1. All-purpose flour: 2 cups
2. Baking powder: 1 tablespoon
3. Sugar: 2 tablespoons
4. Salt: 1/2 teaspoon
5. Unsalted butter (cold): 6 tablespoons, cut into small pieces
6. Milk or buttermilk: 1/2 cup
7. Egg: 1
These simple ingredients are the foundation for creating deliciously fluffy scones.
Step-by-step instructions for making scones
a. Start by preheating your oven to 425°F (220°C) and lining a baking sheet with parchment paper.
b. In a large bowl, combine 2 cups of all-purpose flour, 1/4 cup of granulated sugar, 1 tablespoon of baking powder, and 1/2 teaspoon of salt.
c. Cut in 1/2 cup of cold unsalted butter using a pastry cutter or your fingertips until the mixture resembles coarse crumbs.
d. In a separate bowl, whisk together 1/2 cup of milk, 1/4 cup of sour cream, and 1 large egg until well combined.
e. Pour the wet ingredients into the dry ingredients and gently mix until just combined. Be careful not to overmix as it can result in tough scones.
f. Turn the dough out onto a lightly floured surface and knead it gently a few times to bring it together.
g. Pat the dough into a circle about 3/4 inch thick. Using a round biscuit cutter or glass, cut out scones and place them on the prepared baking sheet.
h. Brush the tops of the scones with some additional milk or beaten egg for a golden finish.
i. Bake for about 12-15 minutes or until the scones are lightly golden on top.
j. Remove from the oven and let them cool on a wire rack before serving.
These step-by-step instructions will guide you through the process of making deliciously fluffy scones that are perfect for breakfast or afternoon tea.
Preparing the dry ingredients
Preparing the dry ingredients is a crucial step in making perfect scones. Start by measuring out 2 cups of all-purpose flour into a large mixing bowl. This will serve as the base for your scone dough. Add 1/4 cup of granulated sugar, 1 tablespoon of baking powder, and 1/2 teaspoon of salt to the flour. These ingredients will provide sweetness, leavening, and enhance the overall flavor of your scones. Whisk the dry ingredients together until they are well combined. This ensures that each scone will have an even distribution of these essential elements. Preparing the dry ingredients properly sets the foundation for creating light and fluffy scones with a delightful texture.
Incorporating the cold butter
Incorporating the cold butter is a crucial step in achieving the perfect texture for your scones. Start by cutting the cold butter into small cubes and adding them to the dry ingredients. Using a pastry cutter or your fingertips, gently work the butter into the flour mixture until it resembles coarse crumbs. This process helps create pockets of butter within the dough, which will melt during baking and result in flaky and tender scones. Be careful not to overmix, as this can lead to tough scones. The key is to maintain small chunks of butter throughout the dough for that light and airy texture.
Mixing in the wet ingredients
Once you have incorporated the cold butter into the dry ingredients, it's time to mix in the wet ingredients to bring the dough together. In a separate bowl, whisk together the eggs, milk, and any additional flavorings such as vanilla extract or citrus zest. Slowly pour this mixture into the dry ingredients while gently stirring with a wooden spoon or spatula. Be careful not to overmix; you want to just combine everything until a slightly sticky dough forms. This will ensure that your scones turn out light and tender. If the dough seems too dry, you can add a splash of milk until it reaches the right consistency. Remember, scone dough should be slightly sticky but still hold its shape when formed into a ball.
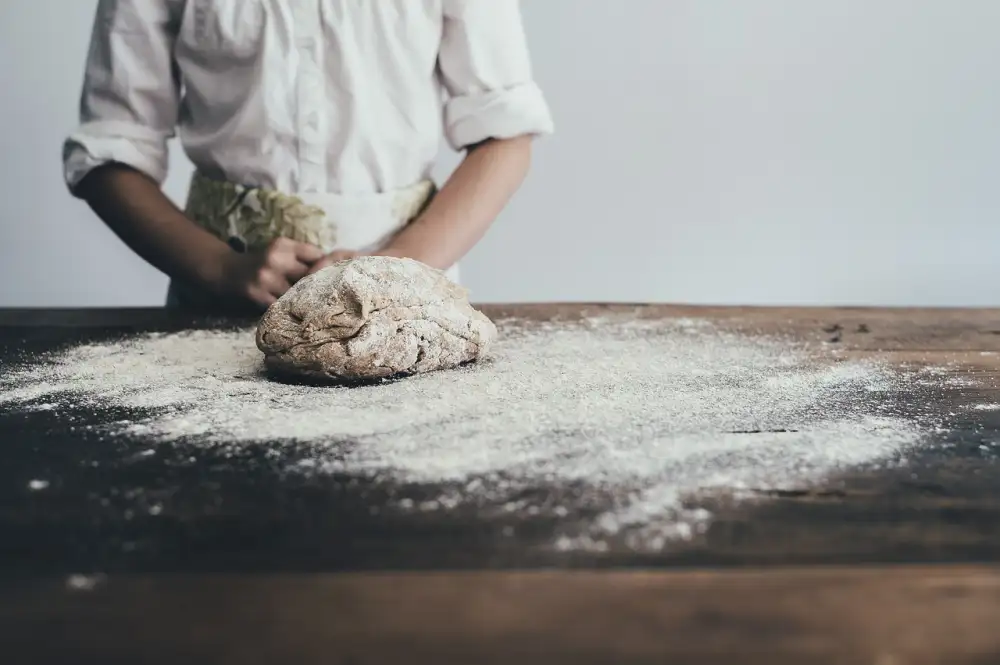
Shaping and cutting the scones
Shaping and cutting the scones is an important step in achieving the perfect texture and appearance. Once the dough is mixed, turn it out onto a lightly floured surface. Gently pat the dough into a circle or rectangle, about 1 inch thick. Be careful not to overwork the dough, as this can result in tough scones.
To cut the scones, use a sharp biscuit cutter or a glass with a smooth edge. Dip the cutter into flour before each cut to prevent sticking. Press straight down into the dough without twisting, as this can hinder rise and affect their shape.
Place each cut scone onto a baking sheet lined with parchment paper, leaving some space between them for expansion during baking. If desired, brush the tops of the scones with milk or beaten egg for a glossy finish.
Remember that scones will rise and spread slightly during baking, so take this into account when placing them on the baking sheet. Any leftover scraps of dough can be gently reformed and cut again, but keep in mind that these may not rise as much as the first batch.
With proper shaping and cutting techniques, you'll achieve beautifully uniform scones that are sure to impress your family and friends.
Baking the scones to perfection
Baking the scones to perfection is the final step in mastering the art of scone-making. To ensure fluffy and golden scones, preheat your oven to 425°F (220°C) and place the shaped scones on a baking sheet lined with parchment paper. This will prevent them from sticking and help them bake evenly.
For optimal rise and texture, it's crucial not to overcrowd the baking sheet. Leave enough space between each scone for air circulation. This allows heat to reach all sides of the dough, resulting in even browning.
The baking time may vary depending on your oven, but generally, scones should be baked for around 12-15 minutes or until they turn a beautiful golden color. Keep an eye on them as they bake to avoid overcooking, which can lead to dry and crumbly scones.
Once baked, remove the scones from the oven and let them cool on a wire rack for a few minutes before serving. This allows them to set slightly and ensures they retain their moisture.
Remember that practice makes perfect when it comes to baking scones. Don't be discouraged if your first batch isn't exactly as you envisioned. With time and experience, you'll develop a keen sense of timing and technique, resulting in consistently delicious and perfectly baked scones every time.
Tips and tricks for achieving the perfect scone texture and flavor
To achieve the perfect scone texture and flavor, there are a few tips and tricks that can make all the difference. Firstly, it is crucial to handle the dough as little as possible. Overmixing can lead to tough scones, so gently knead the dough until it just comes together.
Another important tip is to use cold ingredients, especially butter. Cold butter creates small pockets of steam during baking, resulting in a light and fluffy texture. Cut the butter into small cubes and work quickly to keep it cold.
For a tender scone, avoid overbaking. Scones should be golden brown on the outside but still soft on the inside. Keep an eye on them while they are in the oven and remove them as soon as they are done.
To enhance the flavor of your scones, consider adding a pinch of salt or a teaspoon of vanilla extract to the dough. You can also incorporate different mix-ins such as chocolate chips, dried fruits, or nuts for added texture and taste.
Lastly, don't forget about proper storage. Scones are best enjoyed fresh out of the oven but can be stored in an airtight container for up to two days. To reheat them, simply pop them in a preheated oven for a few minutes until warmed through.
By following these tips and tricks, you'll be well on your way to mastering the art of baking deliciously fluffy scones with perfect texture and flavor.
Variations and additions to enhance your scone recipe
Variations and additions can take your basic scone recipe to the next level, adding exciting flavors and textures. Here are some ideas to enhance your scones:
1. Fruit: Incorporate fresh or dried fruits such as blueberries, cranberries, raspberries, or chopped apples into the dough for a burst of sweetness and tanginess.
2. Nuts: Add a delightful crunch by including chopped nuts like almonds, pecans, or walnuts in your scone mixture.
3. Cheese: For savory scones, consider adding grated cheese like cheddar, Gruyere, or Parmesan. The melted cheese will create a rich and indulgent flavor.
4. Herbs and spices: Experiment with herbs like rosemary, thyme, or basil to infuse your scones with aromatic notes. Spices like cinnamon or nutmeg can also add warmth and depth of flavor.
5. Chocolate: For chocolate lovers, fold in chocolate chips or chunks into the dough for a decadent treat.
6. Citrus zest: Grate the zest of lemons, oranges, or limes into the dough to give your scones a refreshing citrusy twist.
Remember to adjust the quantities accordingly when incorporating these additions to maintain the desired texture and consistency of your scones. Get creative and have fun experimenting with different combinations to find your favorite variation!
Serving suggestions and accompaniments for scones
Scones are incredibly versatile and can be enjoyed in various ways. Here are some serving suggestions and accompaniments to enhance your scone experience:
1. Clotted Cream and Jam: The classic way to enjoy scones is with a dollop of clotted cream and a spoonful of jam. The combination of the rich, creamy clotted cream and the sweet, fruity jam perfectly complements the light and fluffy texture of the scone.
2. Butter and Honey: For a simpler option, spread some butter on a warm scone and drizzle it with honey. This creates a delightful balance of flavors, with the richness of the butter contrasting beautifully with the sweetness of the honey.
3. Lemon Curd: If you prefer a tangy twist, try spreading some lemon curd on your scone. The zesty lemon flavor adds a refreshing element to the scone, making it an excellent choice for those who enjoy citrusy flavors.
4. Fresh Fruits: Pairing your scone with fresh fruits can add a burst of freshness and vibrancy to each bite. Sliced strawberries, raspberries, or blueberries work particularly well with scones.
5. Tea or Coffee: Scones are traditionally served as part of an afternoon tea or coffee break. Enjoy your freshly baked scone alongside a cup of hot tea or coffee to complete the experience.
Remember that personal preferences may vary, so feel free to experiment with different toppings and accompaniments to find your perfect combination. Whether you choose traditional options or get creative with your choices, serving suggestions can elevate your scone enjoyment to new heights.
In conclusion, mastering the art of scone-making is a delightful journey that can bring joy to your kitchen and taste buds. By following the step-by-step instructions and incorporating the tips and tricks mentioned, you can achieve perfect scones every time.
Remember to handle the dough gently, as overmixing can result in tough scones. Additionally, using cold butter and not overworking the dough will ensure a flaky and light texture.
Experiment with different flavors and additions to create unique variations of scones. Whether it's adding chocolate chips, dried fruits, or savory ingredients like cheese and herbs, there are endless possibilities to explore.
When serving your freshly baked scones, consider pairing them with clotted cream, jam, or lemon curd for a traditional English experience. They are also delicious on their own or with a cup of tea or coffee.
So don't be afraid to dive into the world of scone-making. With practice and a bit of creativity, you'll soon become a master baker capable of producing deliciously fluffy scones that will impress family and friends alike. Happy baking!
Published: 04. 03. 2024
Category: Recipes